基于vue3、antvue、cropperjs轻松实现图片完美裁剪,打造个性化上传体验
在项目中遇到了一个需求,即在图片上传前按照特定的比例进行裁剪。
实现这一需求大概的三个主要步骤:
读取图片的Base64编码;
通过
cropperjs进行图片裁剪后生成对应的Base64编码;将Base64编码转换成File对象进行上传。
采用的框架
vue 3.4+
ant-design-vue 4.x
cropperjs 1.6.2
tailwindcss
封装裁剪组件 CropperImage.vue
将裁剪功能封装在一个弹窗组件中,其核心在于完成裁剪操作后,生成新的Base64数据。
import {Modal}from'ant-design-vue';
import{ nextTick, ref }from'vue';
importCropperfrom'cropperjs';
import'cropperjs/dist/cropper.min.css'
const props = defineProps<{aspectRatio: number}>()
const emit =defineEmits(['change'])
const show =ref(false)
const imageUrl = ref<string>('')
const imageRef = ref<any>(null)
letcropper:Cropper|null=null;
constinitCropper=()=>{
cropper =newCropper(imageRef.value,{
aspectRatio: props.aspectRatio,
viewMode:1,
dragMode:'move',
});
}
consthandleSubmit=()=>{
if(cropper){
const baseUrl = cropper.getCroppedCanvas().toDataURL('image/jpeg',0.9)
emit('change', baseUrl.substring(baseUrl.indexOf(',')+1))
}
}
consthandleClose=()=>{
cropper =null
}
defineExpose({
useOpen:(e: string) =>{
imageUrl.value= e;
show.value=true;
nextTick(() =>{
initCropper()
})
},
useClose:() =>{
show.value=false;
cropper =null
imageUrl.value=''
}
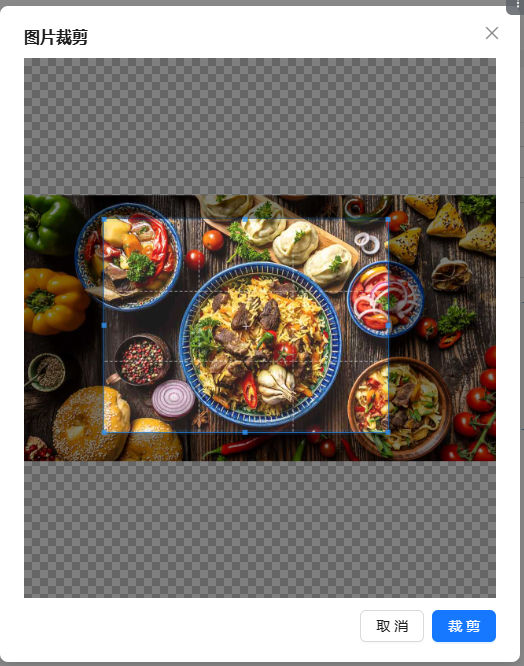
})<template>
<Modal
title="图片裁剪"
v-model:open="show"
ok-text="裁剪"
cancel-text="取消"
@ok="handleSubmit"
@cancel="handleClose"
:destroy-on-close="true"
:mask-closable="false"
>
<img ref="imageRef" :src="imageUrl" style="max-width: 960px; max-height: 680px;display: block;" />
</Modal>
</template>上传组件 UploadImage.vue
该组件主要封装了上传逻辑,包括读取图片、转换成Base64数据、调用CropperImage组件进行裁剪,并将裁剪后的Base64数据转换成File对象进行上传。
import { computed, onMounted, ref }from'vue';
import{Button, message }from'ant-design-vue';
import{UploadOutlined}from'@ant-design/icons-vue';
importCropperImagefrom'./CropperImage.vue';


const cropperImageRef = ref<any>(null)

const prop =defineProps({
txt:String,
value:String,
actionUrl:String,
aspectRatio:Number,// 裁剪比例
});

onMounted(() =>{
console.log(prop.value)
})

const emit =defineEmits(['update:value','change']);

const picUrl = computed<string>({
get:() =>{
console.log('get', prop.value);
if(prop.value&& prop.value.length>0){
return`${prop.value}`;
}
return'';
},
set:(val: any) =>{
emit('update:value', val);
emit('change', val);
},
});

const fileRef = ref<any>(null)


consthandleChange=(e: any)=>{
if(e.target.files.length===0){
      message.warn('请选择文件')
return
}
const render =newFileReader();
    render.onload=function(){
if(this.result){
const baseUrl = render.result;
        cropperImageRef.value.useOpen(baseUrl)
        fileRef.value.value=''
}else{
        message.warn('文件读取失败')
}
};
    render.readAsDataURL(e.target.files[0]);
};

consthandleRemove=()=>{
    picUrl.value='';
};

constbase64ToFile=(base64: string, mine:string, filename: string)=>{
const bstr =atob(base64)
let n = bstr.length
let u8arr =newUint8Array(n)
while(n--){
      u8arr[n]= bstr.charCodeAt(n)
}
returnnewFile([u8arr], filename,{
type: mine
})
}

consthandleCrop=async(base64Url: string)=>{
const hide = message.loading('上传中,请稍后...',0)
try{
const file =base64ToFile(base64Url,'image/jpeg',`${new Date().getTime()}.jpg`);
awaitcustomRequest({
file: file,
onProgress:(process: number) =>{
console.log(process)
},
onSuccess:(url: string) =>{
          picUrl.value= url
emit('change-file-name', url)
},
})
      message.success('上传成功')
      cropperImageRef.value.useClose()
}catch(e){
console.error(e)
      message.warn('上传失败')
}finally{
hide()
}
};

constcustomRequest=async(e: any)=>{
console.log(e)
const file = e.file
// 这里进行上传操作
// ...
  }
<template>
<div>
<div v-if="prop.value && prop.value.length > 0" class="img_box">
<a :href="picUrl" target="_blank">
<img class="img" :src="picUrl" />
</a>
<Button size="small" danger @click="handleRemove">移除</Button>
</div>
<div class="relative">
<Button>
<UploadOutlined />
{{ prop.txt ? prop.txt : '点击上传' }}</Button>
<input ref="fileRef" accept="image/*" type="file" class="absolute left-0 top-0 right-0 bottom-0 opacity-0 z-20" @change="handleChange" />
</div>
<CropperImage ref="cropperImageRef" @change="handleCrop" :aspect-ratio="prop.aspectRatio ?? 1" />
</div>
</template>使用
在需要使用上传组件的地方,引入UploadImage组件并按照以下方式使用:
<UploadImage v-model:value="formState.thumb_img" :aspect-ratio="776/384" />实现效果如下: